Having learned techniques of using a white cane, one starts studying routes. At first, the routes are short and simple. Then the number and the difficulty of the routes gradually increases. The most productive way to learn them is by using tactile maps. Marta Lyubimova, visual impairment specialist and teacher, expert in wayfinding and mobility, columnist of the Special View portal, tells us what relief maps are for, how to make and use them.
What Relief Maps Are For
There are many ways to study routes, but learning them using tactile maps or mockups is the most productive one. If the knowledge about the route is limited only to memorizing the number of turns and reference points, it allows a person to reach their destination, but in many cases does not help to create a notion of their surroundings, of what they are passing or going around. This is where relief maps and mockups come handy.
Verbal or audiomaps may be used together with relief ones. They have different functions, but they perfectly complement one another. Using tactile maps gives amazing opportunities to a wayfinding teacher.
The understanding of how the space is organized and what it contains is called a mental map. Sometimes in specialized literature a mental map is also called a cognitive map. If a sightless person knows only the route, but their grasp of the surroundings is limited solely to the objects that they directly come across along the route and that their cane touches in course of movement, then the person has a mental map on a route level. One should aim at broadening one’s concept of the surroundings. If a person has lost their vision in middle age and has accumulated visual images, it may be easier for them to imagine the way the place looks based on a description. For congenially blind children, verbal description of a route without working with tactile maps may not be enough.
Experts in wayfinding and mobility notice that using relief maps while studying a route substantially shortens the time needed to memorize the way. A student starts to understand where he or she is on the route and in relation to the objects that are found along the way.
In this article we will be speaking about relief maps only.
The Types of Relief Maps
Experts in wayfinding and mobility discern the following types of relief maps.
1. Map of a route (way map).
2. Map of a space (view map).
3. Map of an intersection.
4. Map of a public transport route.
A map of a route contains only the elements that are situated on the way along the route: roads, intersections, driveways, point A and point B. When creating a map of a route there is a rule: it is better to show less than include even one unnecessary detail on the route. If an object does not serve as a reference point but simply exists, it is not shown on a map of a route. The only things that are depicted except objects that are directly touched by a white cane are the rays of intersections because a person needs to know whether they are facing an intersection or just a road turn.
If you want to complement your map with objects that are situated in the street the route lays along, as a result you will get a view map. It is preferable to add buildings to the route after it has been studied, or make a special map for that purpose.
The map must give the essential information and be used in such a manner so that a sightless student could understand the map itself and the relation between what is reflected on it and the surroundings.
You shouldn’t make extremely detailed maps and include too many elements in them. It will impede the understanding of your map and make it useless for a visually impaired person. Always take into account the level and the age of the person you are making the map for, and keep in mind the goals you are aiming at.
If you give a complicated map to a child, it is possible that he or she will not understand what is depicted on the map and why.
How To Make A Relief Map
The key peculiarity of a way map is that a person can take it to the lesson while studying the route. That is why the map must be of a convenient size, weigh little, but be robust. Maps of a space may be more massive and intended for use indoors only. A map of a city or a quarter may be made of wood, plexiglass, cardboard.
Way maps can be conveniently made of cardboard and paper with various textures: velour paper, corrugated paper and so on. Each texture may be assigned a certain meaning. For example, roads may be made of velour paper, point A of corrugated paper, point B of paper with some other kind of texture.
The maps may be printed using a special Braille printer, or made using special paper for relief images. Note: do not use Braille paper or Braille printer to print out maps downloaded from the Internet that are intended for use by people without visual impairments. The map must in all cases be specially adapted for tactile perception.
To make a map quickly, you may use the Shkolnik aid.
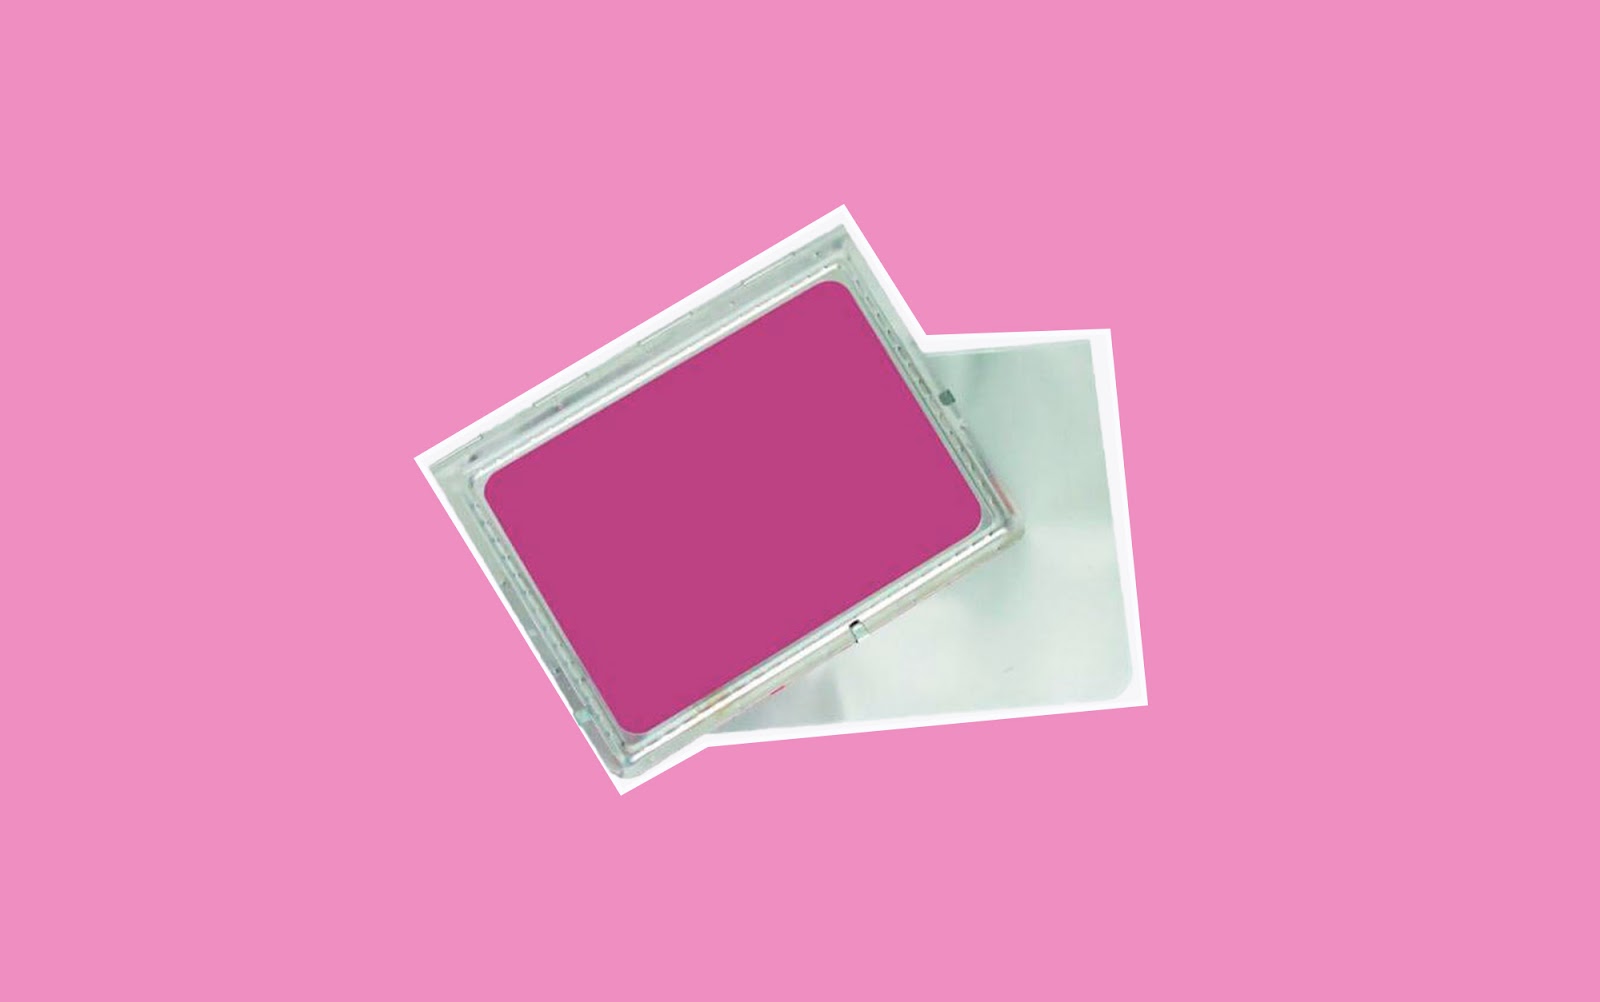
Audio description: a multicoloured collage. An implement for graphics for the blind and visually impaired is shown against a pink background. It is a rectangle plate with metal base and a sheet of pink rubber over it. The sheet is fixed with a metal frame. Under the plate there is a stack of film for drawing.
Construction Kit For Creating Relief Maps
Construction kits are indispensable when you need to create a map quickly and teach students to work with it. What are the options you have?
The Orientir Aid
It consists of metal plates and a set of magnet tapes of different length, and also wooden stimulus material. May be used for classwork. Using it outdoors is not very convenient because magnet stimuli tend to slide along the plate, they are too large.
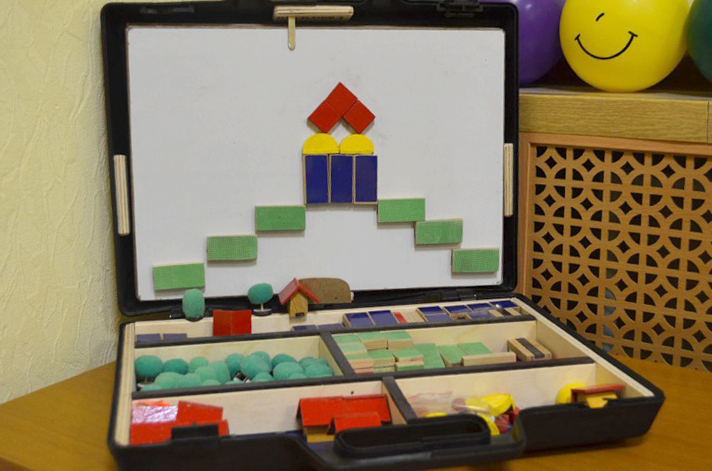
Audio description: a coloured photo. An open case lies on a table, inside it there are compartments with 3D geometric figures of different shapes and colours. White material is fixed on its open lid, several such figures are attached to it.
Construction Kits Based On A Folder And Including Stimulus Material With Velcro On The Back Side
It is a folder of A3 or A4 format (29 by 42 or 29 by 21 cm) covered with special fabric to attach stimulus material to. Stimulus material is of various shapes and texture. Such aids are convenient both for indoor and outdoor use.
Requirements For The Map Used During Wayfinding And Mobility Training
Size
The map must be convenient to use. That is why its size must not exceed the size of two open hands, namely 40 to 45 cm. The map may be smaller, if one is planning to show not that much information on it.
Base For The Map
The base for the map must without fail be robust enough so that the map may be held by students during the training.
Types Of Symbols
There are three major types of symbols: dots, lines and territorial signs.
A dot symbol can show the place where any object or reference point is situated.
Linear symbols reflect the information that is linear by its nature. They show both the location of an object and its direction. For example, they may depict roads, corridors, driveways, barriers and so on.
Territorial symbols give the information on an object and its form and size as it is seen from above. Special texture or colour may be applied to show the location, outlines and size of one specific building or any other object.
The Size Of Symbols And The Way To Place Them
The map must have a mark pointing to the north, for example, an arrow.
The symbols must be spaced at least 3 mm from one another.
The space between a symbol and Braille labels must be at least 3 mm.
If the form and the texture of the symbols are identical, but they differ in size, then on the map one of them must be at least 25 to 30 per cent larger than the other one.
The symbols on a route map should preferably fit in a row under three fingers. For example, the middle finger is moving along a “road”, and at the same time the index and the ring fingers are finding and defining the symbols near it.
The size of the symbols: if there is no need to make them larger, then in order to show the correct scale, the symbols must fit under a pad of a finger. Simply speaking, the symbols must be as small as is convenient for use. A map with large symbols is difficult to perceive and use.
To show roads, you may use straps of material 5 mm in width for less important roads and driveways and 8 to 10 mm in width for major ones.
Try to use the same symbols to show identical objects in different maps. For example, think of a symbol to stand for staircases and so on.
Symbols for a specific map must not resemble one another so they wouldn’t be mixed up, and the information they reflect must be easy to perceive. The symbols to be used in one map must differ from one another.
At first, take a pencil and a sheet of paper and sketch a plan, prepare the symbols and then move to sticking them to the base material. Try to keep true to the scale.
How To Make A Plan
One should make sketches for a relief map and for developing a route in the same space where a person with significant visual impairments is going to move about. Using digital maps you may get a concept of the place in advance, but in order to show everything precisely and clearly one should study the real space. Digital maps sometimes lack or misplace paths, sidewalks and so on.
How To Start Training A Person To Use A Relief Map
The best way to do it is not to give a child his or her first map in its completed form but to make it together with the pupil.
It is easier to start with an indoor space. Best of all to choose a room or a classroom. Starting from the entrance door, stick all the objects that are found inside to the map. Make sure that the child understands which object stands for each symbol. Work with the resulting map, think up various games.
Then take the child to the corridor, give him or her a clear constructor aid field or a clear piece of cardboard.
Fix the lines that show the corridor upon the base. You may mark the door beside which you are standing as a starting point.

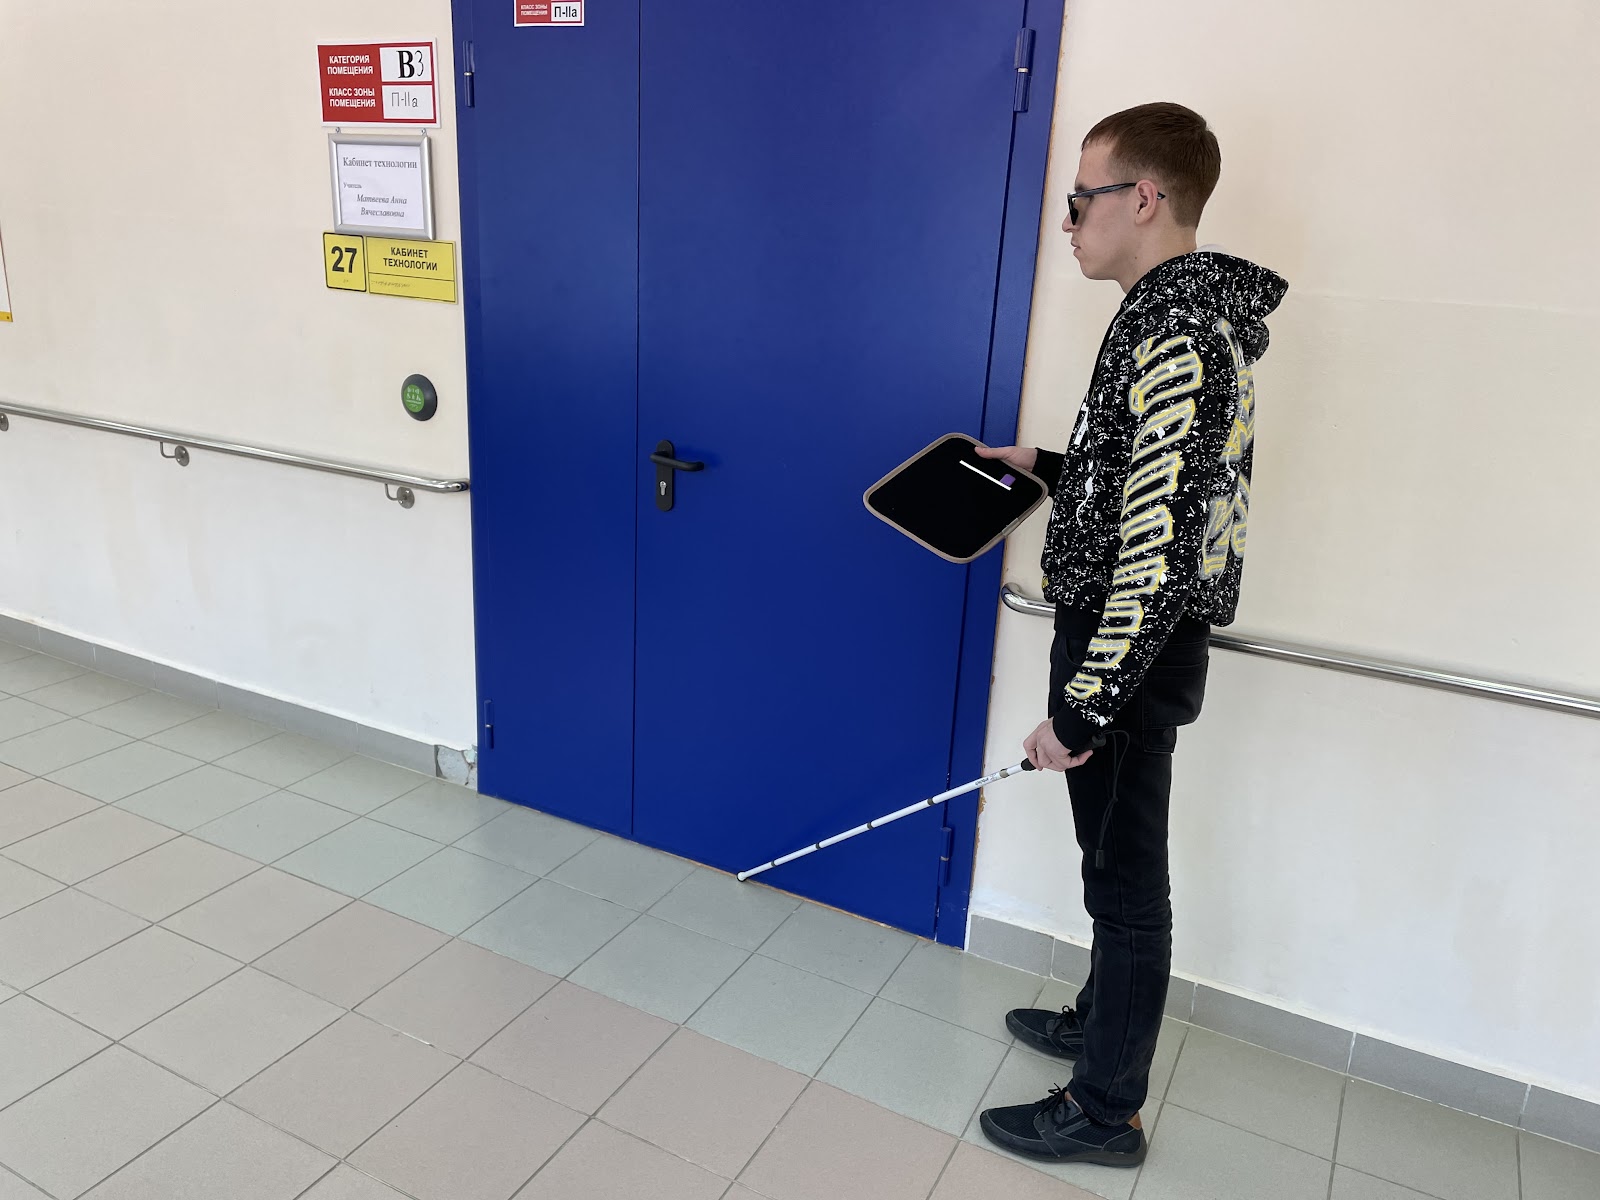
Audio description: a coloured photo. A person is standing near a door and leaning on a white cane. The person is holding a relief map. There is a white strap on the black background, to the right of it there is a small lilac rectangle.
Together with the child move along the wall and mark the objects you find. If you find a door with a cane or by hand, then show it on the map.
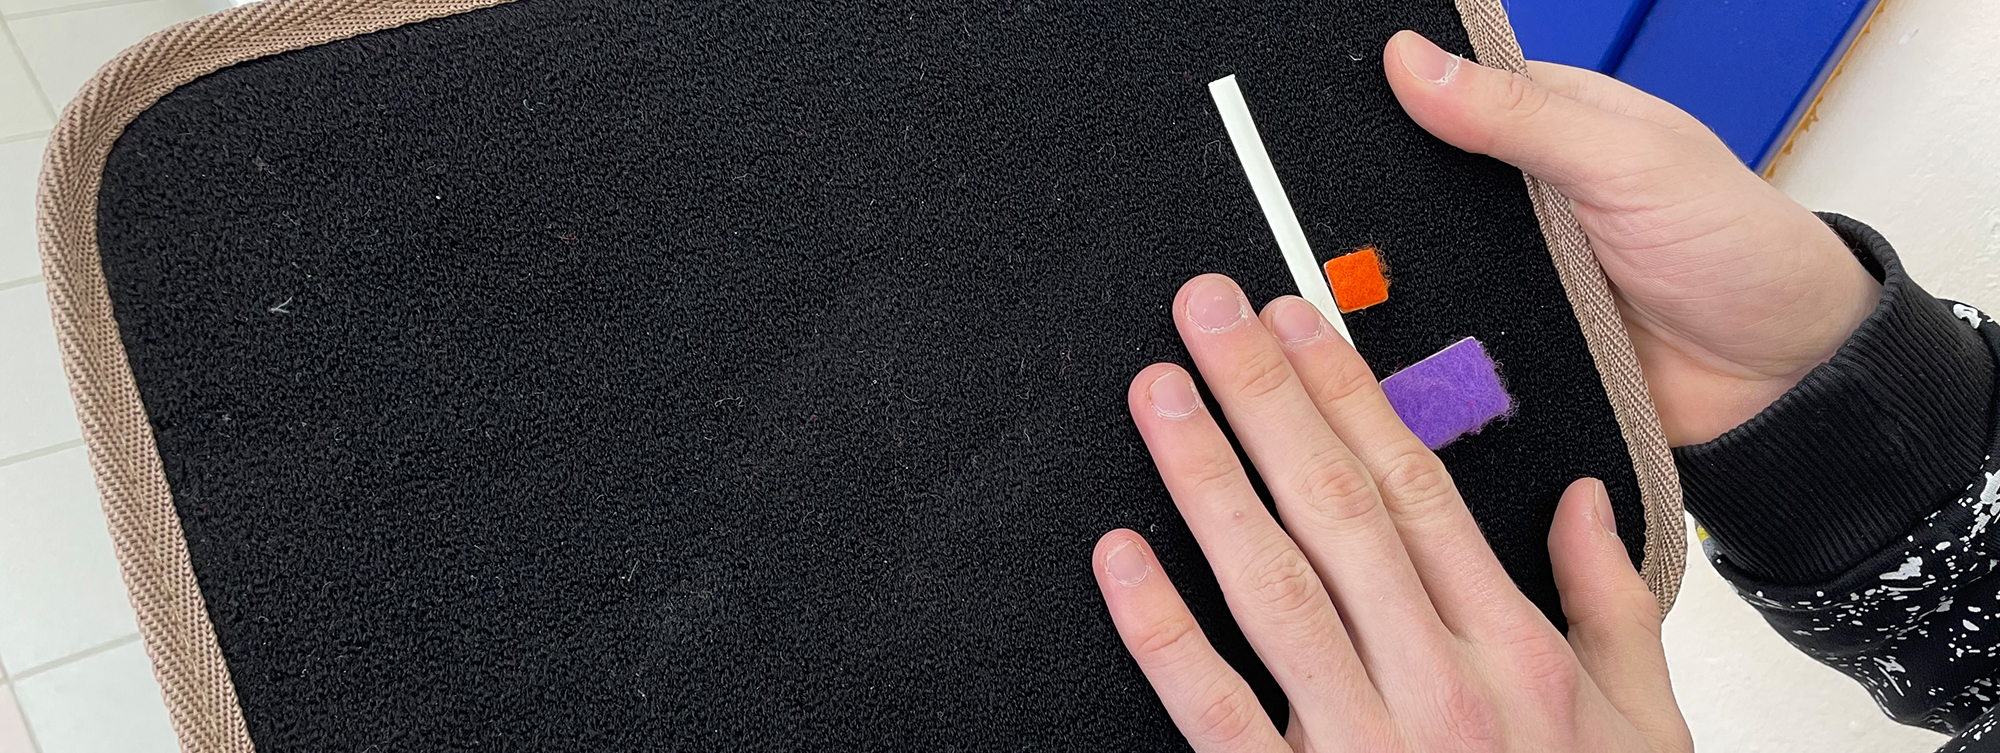
Audio description: a coloured photo. A young man in dark glasses is standing in a corridor by a door. In his right hand he is holding a relief map, in the left hand there is a white cane, he is touching the threshold.
If you find six doors, do mark them. If you reach a staircase, attach the element that symbolizes a staircase. Mark all the objects on the map.
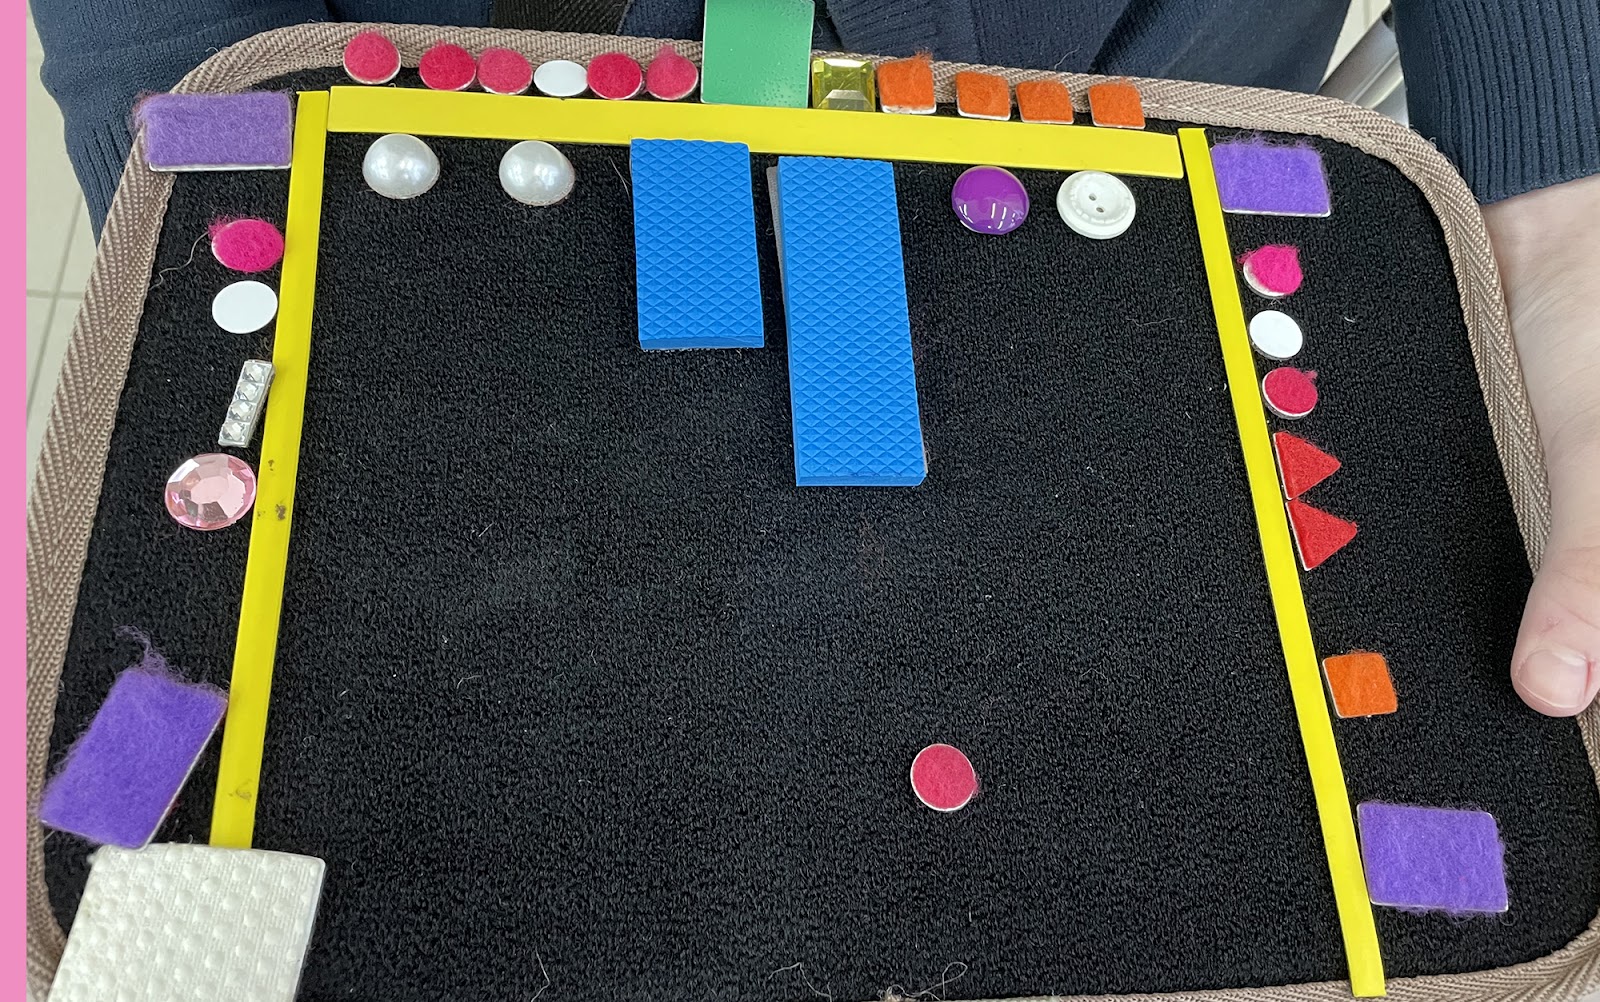
Audio description: a coloured photo. Hands are holding a relief map. Many geometric figures of different shape and texture are laid on a black fabric, as well as a button, flat-bottomed beads and sequins.
You may create a map of a room or surroundings of a house or schoolyard.
While studying a floor plan, it is better to show only corridors, doors, staircases, etc. You may use symbols with different texture and shape to show doors leading to rooms meant for different purposes. For example, you may mark classroom doors with circles and lavatories with triangles and so on.
Do not use fire escape maps as an example for a relief map at the initial stage of training. They will give too many details and lines and make the work more difficult. Such maps depicting walls may be used at a more advanced stage of training to show how the space is organized.
Together with the child make plans for different floors of the school or a house and compare them, tell the child about the principles of building structuring: if you know where a WC or a staircase is located on the first floor, then on the second floor you will find them in the same place, etc.
Games
You can organize games for the children using relief maps. Invent quests, mark places on the map where instructions are hidden. You may mark places where a “treasure” (a candy) is located. Or ask the pupil to hide something and let him or her mark this place on the map.
Make maps with errors: put extra elements there, change their places, make a mirror map and so on.
Reading A Map
In order to understand what is shown on a map, a pupil must distinguish the symbols and know what they stand for.
For better understanding of the plan, both hands are used to read it. Later the pupil may use one hand for active studying and the other one to hold the map.
A sightless trainee must learn to trace a route using a map. While moving along the route you may give the pupil its verbal description.
Teach the student to scan a map and to study it carefully.
Find The Reason Of Fear And Difficulties In Studying The Route
While working with a route ask the trainee to create the way map as he or she perceives it. Thus you will learn what your student has memorized or forgotten.
In case of bad weather when there is no opportunity to go outside and follow the route, you may work on a mental map of the place using maps.
When you start actively using tactile maps you will undoubtedly appreciate their advantages.
There are three major types of aids for training in wayfinding and mobility.
1. A mockup (a model): a 3D image of an object, an exact or a simplified copy of a real object or space.
2. A map: a flat schematic image of a space or an object in space. There exist different maps: relief ones (for tactile perception), graphic ones (for visual perception) and relief and graphic ones (for both tactile use and residual vision).
3. An audio map: an audio record or a written description of a space, instructions on moving along the route.